
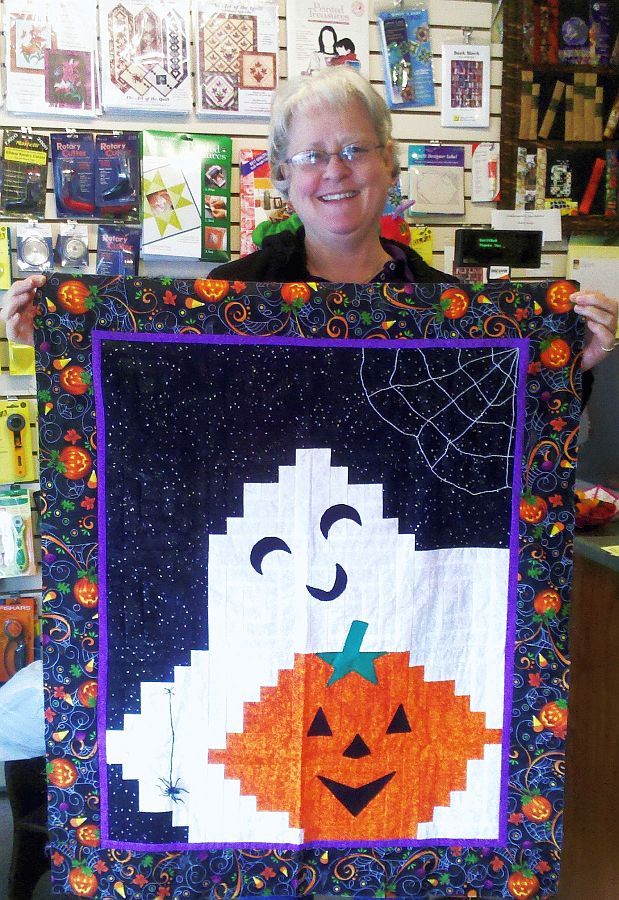
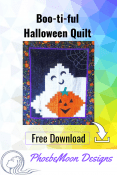
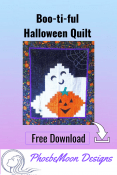
Boo!-ti-ful Halloween Wall Hanging
An original pattern by Christine Schnaufer © Traditionally Yours, 1991
Chris Schnaufer offered this pattern to me when she retired back in 2003. I had it on the Quiltbus site until 2010 when I moved it to Scrapdash. This is a quick and easy wall hanging. Based on the Log Cabin block, the finished project measures approximately 30″ x 36″.
Use the green Print Friendly button at the bottom of this page to print out this page.
Boo!-ti-ful Halloween Wall Hanging
Supply List:
- 1 yd Black or Navy for sky (includes binding)
- 1 yd White or White on White for ghost
- 1/3 yd Orange Print
- 1/8 yd Green for pumpkin stem
- 3/8 yd Borders
- 1/3 Black binding (if you don’t want the sky fabric)
- 1 yd Backing (How about the Hocus Pocus witches?)
- 1 yd Batting (or craft size 36×45.)
- Thread to match backing
- Nylon YLI or Sew Art machine quilting thread (or cotton thread if you prefer)
- 14″ black yarn with knot at bottom for spider. The messier the better.
- Quilting thread, crochet thread, rayon or your choice for spider web.
- Small Safety pins for basting (Brass #1 are best).
- The Usual Suspects: Sewing Machine, walking foot, darning/ free motion quilting foot, rotary cutter, mat & ruler, seam ripper.
Cutting
- Keep fabric as it comes off the bolt, cut from selvage to selvage. (Width of Fabric)
- Note: While the actual yardage figures above are accurate, the actual number of strips may vary depending on the method you use for log cabins, and your technique.
THESE CUTTING FIGURES ARE ESTIMATES, your mileage may vary.- Blue or Black Fabric: cut (9) strips 1-1/2″ wide by 44″ long.
- White Fabric: cut (7) strips 1-1/2″ wide by 44″ long.
- Orange Fabric: cut (4) strips 1-1/2″ wide by 44″ long.
- Border Fabric: cut (4) strips 3″ wide by 44″ long.
- Binding Fabric: cut (4) strips 2-1/2″ for double fold, cross-grain.
- Backing Fabric: cut backing fabric to approx. 36 x 40″(or just trim off the excess when squaring edges for binding).
Sewing
Kris’s Note: If I were making this pattern, I would substitute a 6-1/2″ square of fabric for the solid Log Cabins.
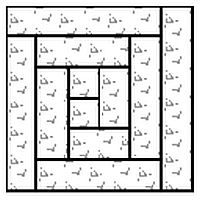
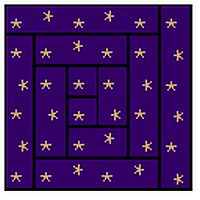
Assemble the Wall Hanging as Follows:

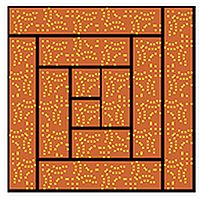
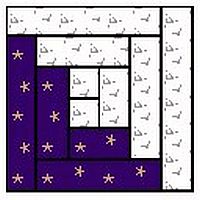
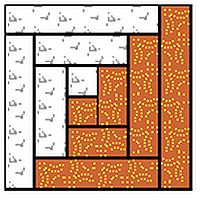
Note: Assemble each row as shown, then join the rows. For simplicity, the two color log cabin blocks are shown as half square triangles to indicate placement and rotation to achieve the finished design.
Keep Going!
Top & Bottom Borders: …Measure the width across the center of the pieced top and cut two of the 3″ border strips to that measurement. Using a 1/4″ seam, attach these strips to the top and bottom, easing the top if necessary to square up the top.
Side Borders: …Measure the height of the pieced top and the two attached borders across the center and cut the remaining two 3″ border strips to that length. Using a 1/4″ seam, attach these strips to the left and right, easing if necessary to square up the top.
Appliqué Faces: …Draw your own face for the ghost and the pumpkin and cut from black fabric. Appliqué into place with stitching or fusible web. Follow the same process for the pumpkin stem.
Binding: …Sew (4) binding strips together into one long strip. Press width in half, wrong sides together.
Finishing Up:
- Layer top, batting and backing and baste.
- Hand or machine quilt as desired.
- Trim and square up the edges for binding.
- Bind in standard fashion.
- Whip stitch a pocket for hanging to the back if desired.
- Embellish with spider web in upper corner and spider dangling from lower edge, or as you desire.
You’re done!
Here are other Halloween ideas:
- Boo!-ti-ful Halloween Wall Hanging or Lap Quilt
- Halloween Hoppin’ – Using Purple in a Halloween Quilt
- Halloween Freebie – Spiders in My Attic
- Ghastly Ghouls and Zombies
- A Batty Pumpkin Quilt Block
- Free Braided Table Topper Pattern for Halloween
- Orange You Glad Harvey?
- Boo! A Fussy Cut Monster Mash Quilt Block
- A Quilted Halloween Story
Have another tip to offer? Send it to me or reply below and I will add it here.
Don’t forget to sign up for the newsletter! Once a week, I send updates on quilt-related information I have found while wandering the web. This might be an inspiring article, a tip or tutorial I have discovered (or written), and occasionally exclusive offers & discounts as well as immediate access to the secret page of free patterns, guides, and printables. You can follow my page on Facebook, or join the Make Believe Quilters group, too.

What a novel way to use log cabin blocks! Your quilt is adorable and lovely.
Oh the Halloween goodness in every way! What a fun project. Thanks for the tutorial.
Well that quilt is so happy and cute looking, not at all creepy or spooky, but hey I like cute Halloween too! A fun way to create it!
I love how your quilt turned out. Great way to use the log cabin blocks. Thanks for the tutorial!
OMG I have made that one years and years ago and loved it so much!!
Super cute! Great way to use the log cabin block!
Great quilt, thanks so much for sharing!
This is a super Hallowe’en project when you have little ones at home. Thanks for bringing it out, and showing how to move forward with it. Happy haunting!
I love that you used log cabin blocks to make this wonderfully spooky design. Very creative!
Cute and friendly quilt.
What an adorable quilt! It is just so cute! My grandchildren would love one!
What a fun quilt!!
What an adorable wall hanging. I love that the spooks have smiles on their faces. Thank you for all the great tips, etc. Perfect.
Log cabin blocks are some of the most versatile blocks in our quilting arsenal, I think! This is a very clever use of them, and such a cute quilt!
This is such a dang cute quilt. Thanks so much for the construction detail and all of the great Halloween ideas.